[ad_1]
[Photographs: Vicky Wasik]
Cream pies are an American tradition dating back to the early 1800s, when they were invariably served in a flaky pastry crust and topped with meringue—the eponymous “cream” referred to the dairy in their custard filling. I’ve gone over the logic behind that convention before, in my explanation of why I top my chocolate cream pie with meringue rather than whipped cream. This naming convention is exactly why we have both coconut cream pie (creamy custard) and lemon meringue pie (juicy custard), even though each was historically topped with meringue.
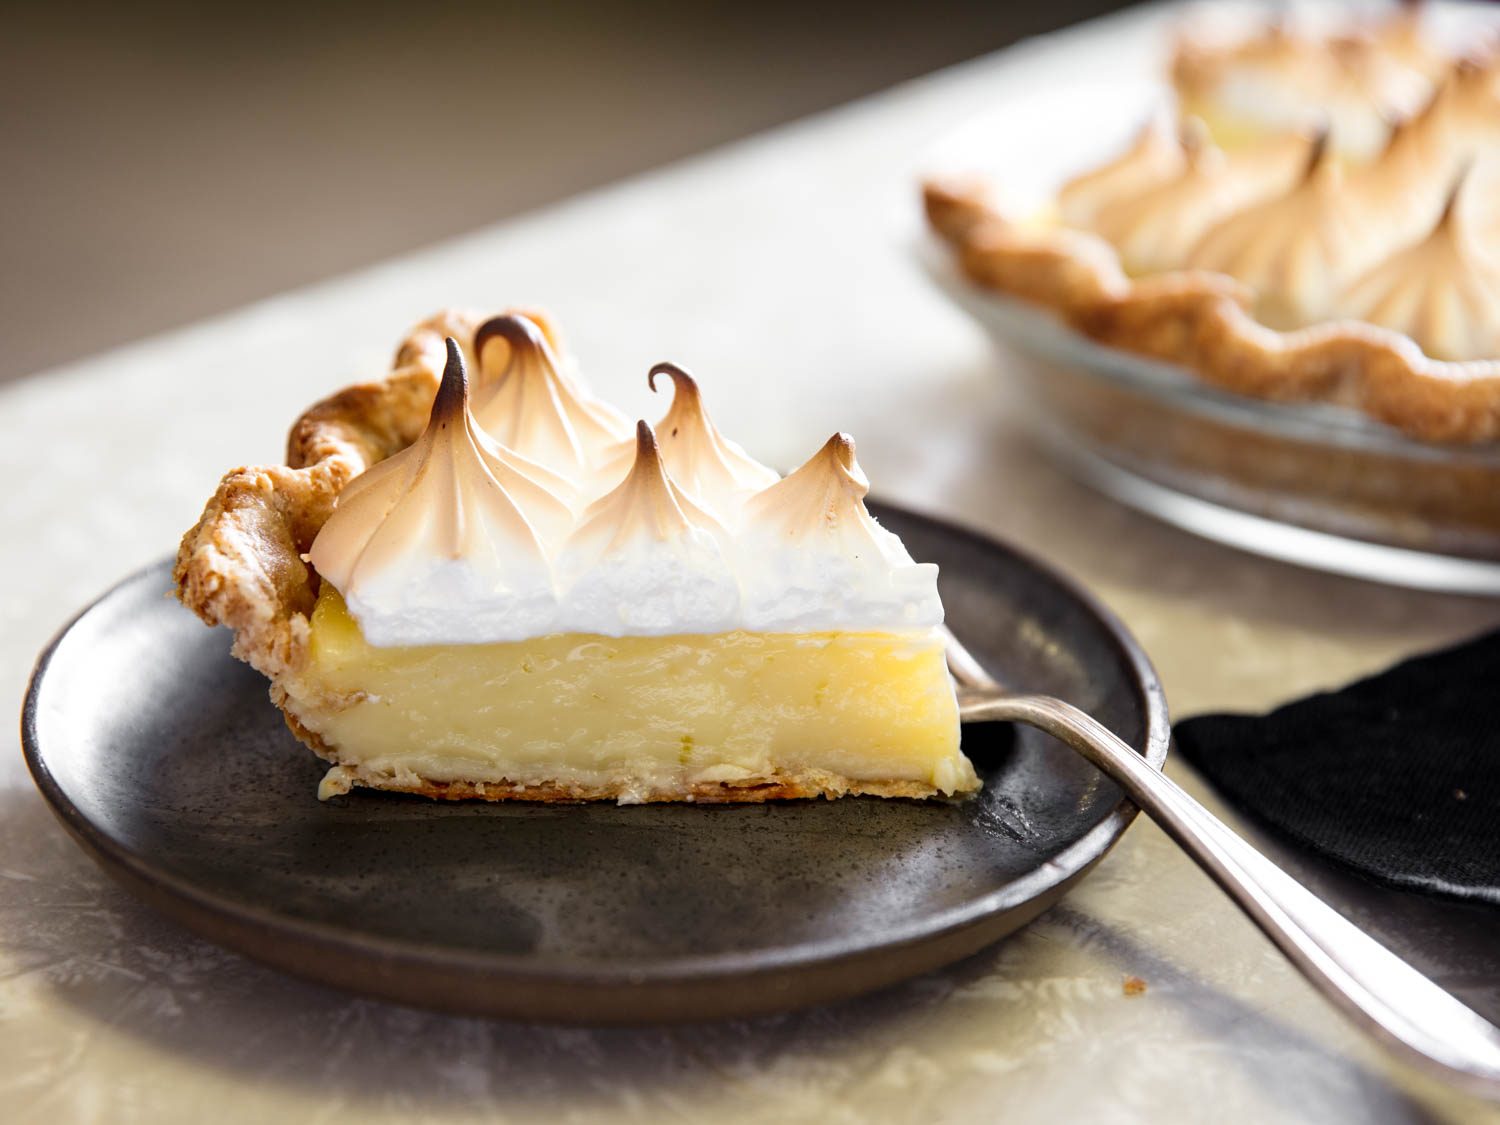
Though all but forgotten today, lemon cream pie used to be quite common as well, prized for its gentle acidity and subtle richness. The recipe looked more or less like that for any other lemon meringue pie, but it was made with milk instead of water in the filling. Of course, heat plus acidity and milk sounds like a recipe for cheese, but the sugar, starch, and yolks in the custard work to prevent the milk from curdling. The result is a deliciously creamy pie with a mellow citrus character along the lines of orange sherbet.
While lemon cream pie is a thing of beauty, there’s no lack of lemony options on Serious Eats—we’ve got lemon bars, lemon meltaways, lemon chantilly, lemon sorbet, lemonade, lemon-candied pistachios, lemon syrup, lemon scones, and heck, even lemon spaghetti—so I think it’s time to show limes a little love.
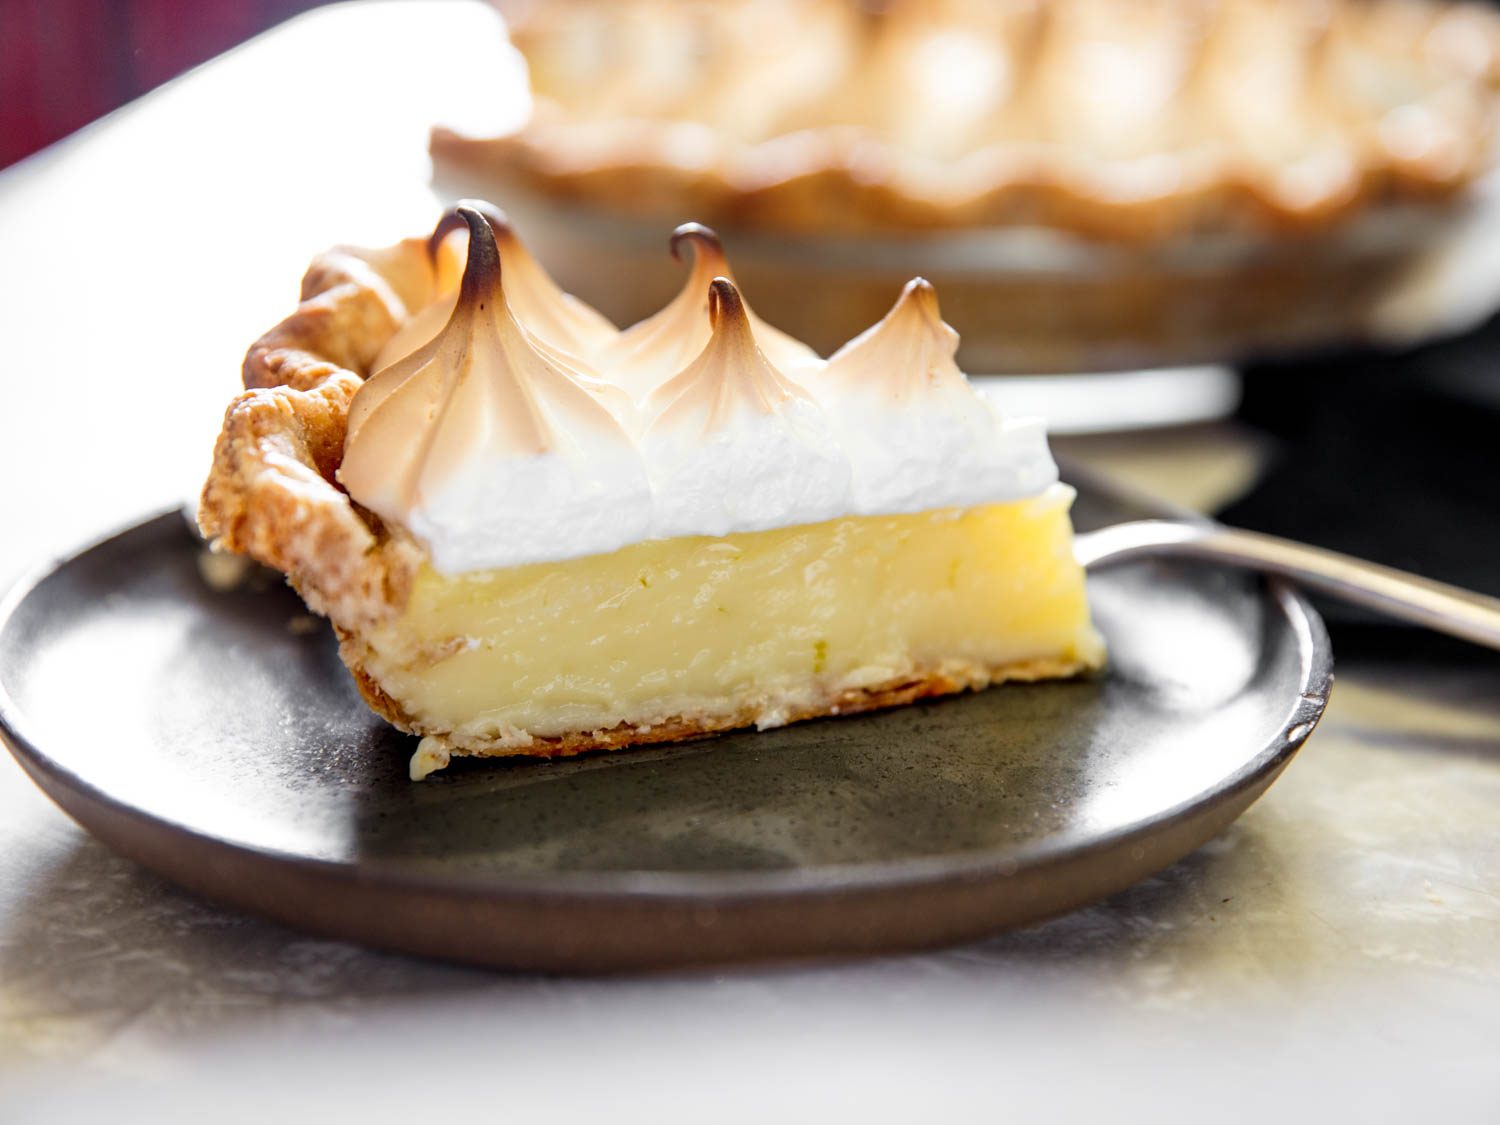
They have a natural affinity for dairy, and give this cream pie a fresh flavor to brighten up any afternoon. Topped with toasty peaks of Swiss meringue and nestled in a whole wheat crust, it’s a dessert that’s ready to give Key lime pie a run for its money.
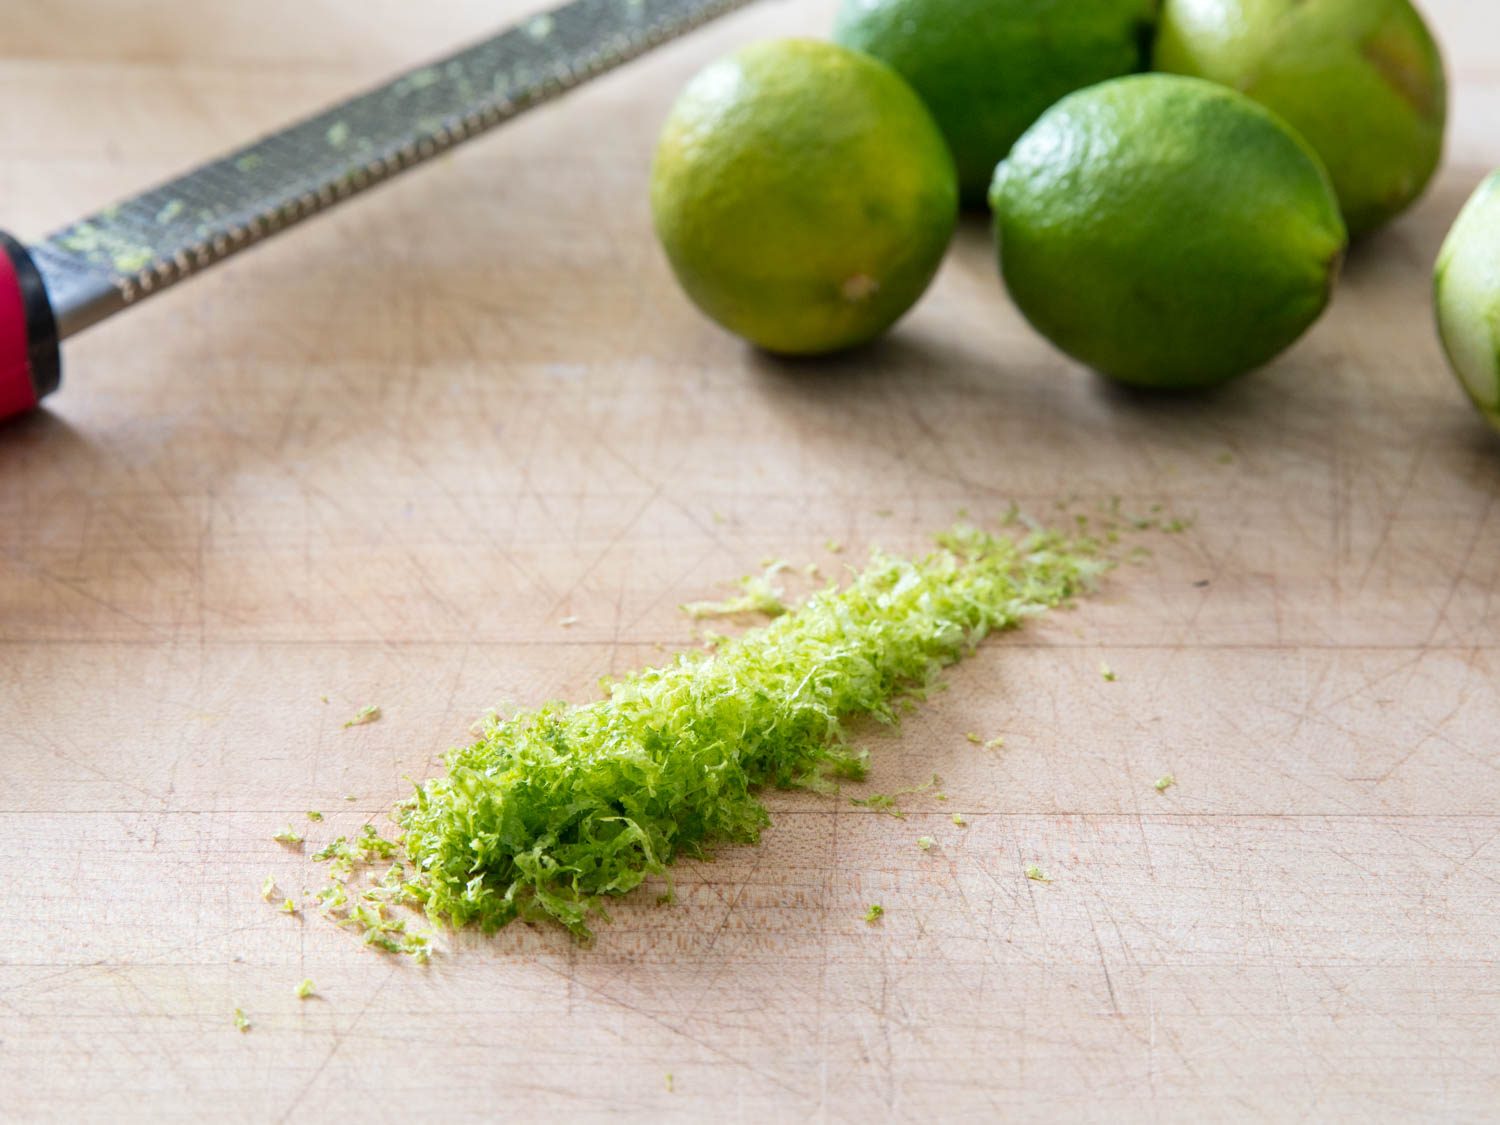
I start by zesting and juicing the limes, a step that can be knocked out a few days in advance if the juice is refrigerated in a nonreactive, airtight container. Freshly juiced citrus is key for raw applications, but in a cooked custard, that fresh nuance will be lost anyway; since juicing and zesting are the most time-consuming steps of the recipe, this is a great opportunity to break the process up into bite-size tasks.
Regardless of how you time it, after juicing the limes, don’t you dare throw away those rinds! With a scoop of sugar and a few hours of neglect, citrus rinds can be passively turned into a tart no-cook syrup that’s brilliant in cocktails or as a dressing for fresh fruit.
Once the zest and lime juice are prepared, the lime filling comes together much like the one for my chocolate cream pie. Unlike some other stovetop custards, which temper hot milk into a mixture of sugar, cornstarch, and egg, mine combines these ingredients from the start.
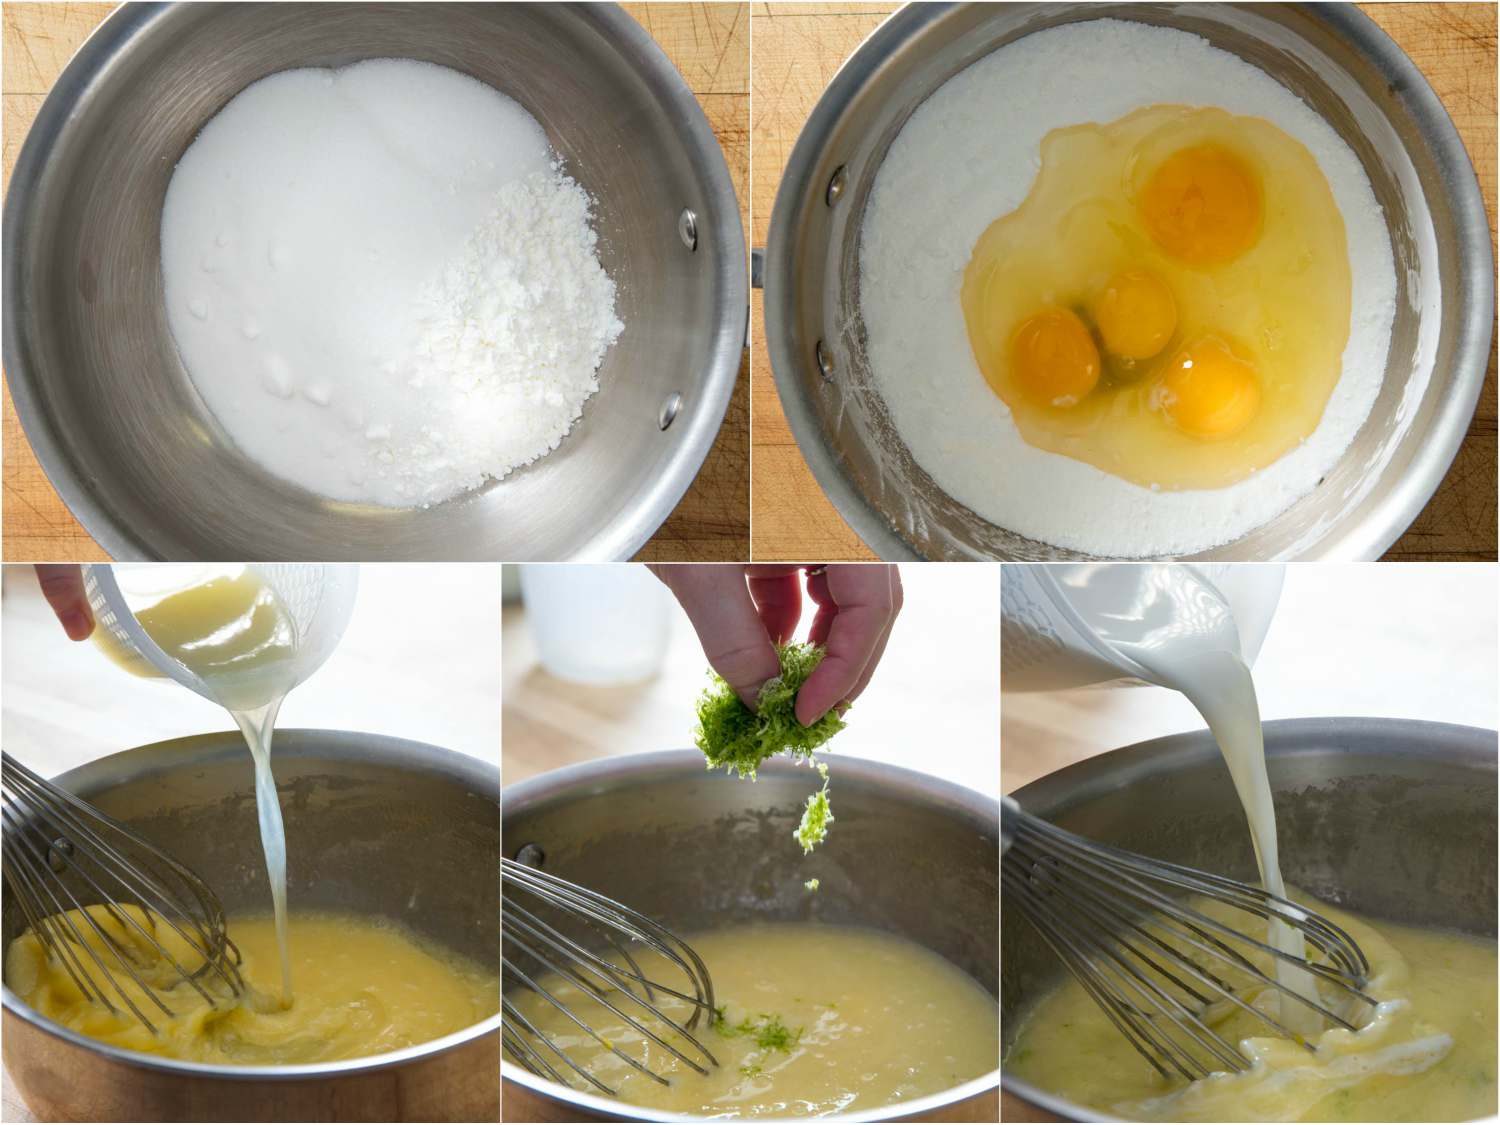
Gently warming the mixture over low heat accomplishes the same thing (i.e., warming the eggs without scrambling) as traditional tempering methods, but with less mess and fewer dirty dishes. Once the mixture is warm to the touch, it’s safe to raise the heat and continue cooking and whisking until it’s bubbling-hot.
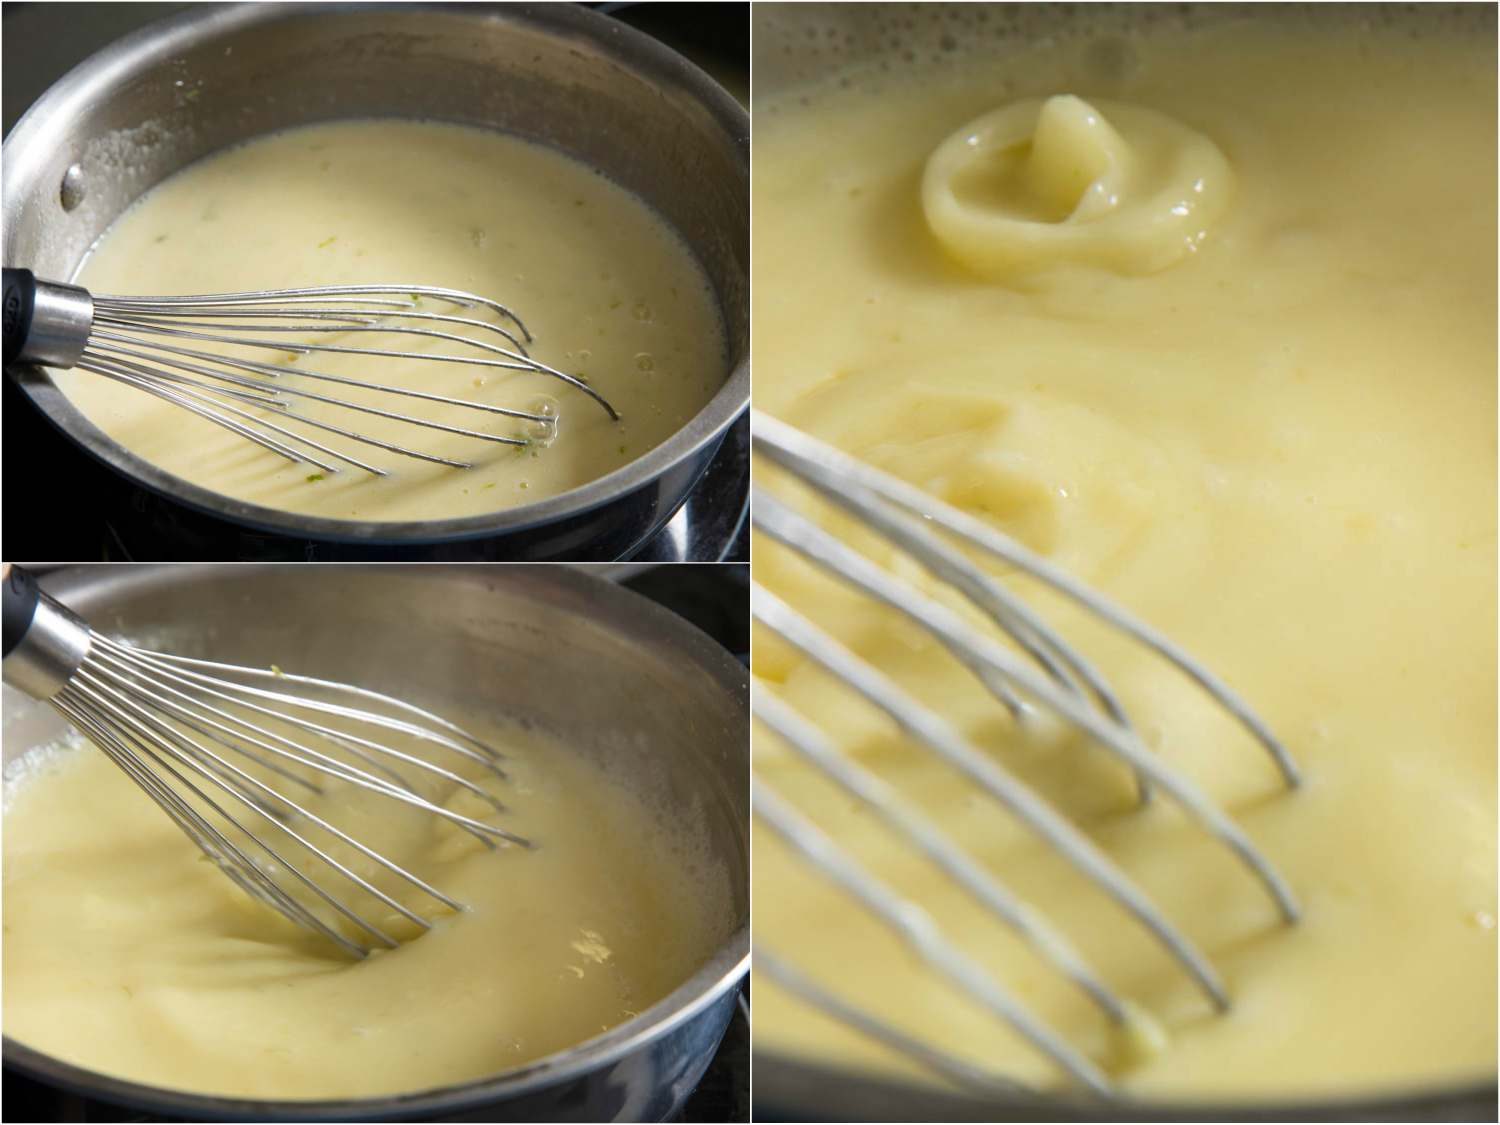
The whisking part is super important, so make sure you’ve got the right whisk for the job: a balloon whisk for sauciers or a ball whisk for pots with tight corners. When the first bubble appears, continue cooking and whisking for exactly two minutes more.
This isn’t about reaching a specific temperature—the custard will be 212°F (100°C) from start to finish. It’s about holding the custard at boiling heat to denature a starch-dissolving enzyme found in egg yolks. Skip this step or guesstimate the time, and you may wind up with lime soup instead.
When the time’s up, stir in a few drops of rosewater off heat. Thanks to some shared essential oils in their chemical composition, rose and citrus pair like a dream, with the rosewater restoring the sense of freshness that cooking tends to dull in citrus.
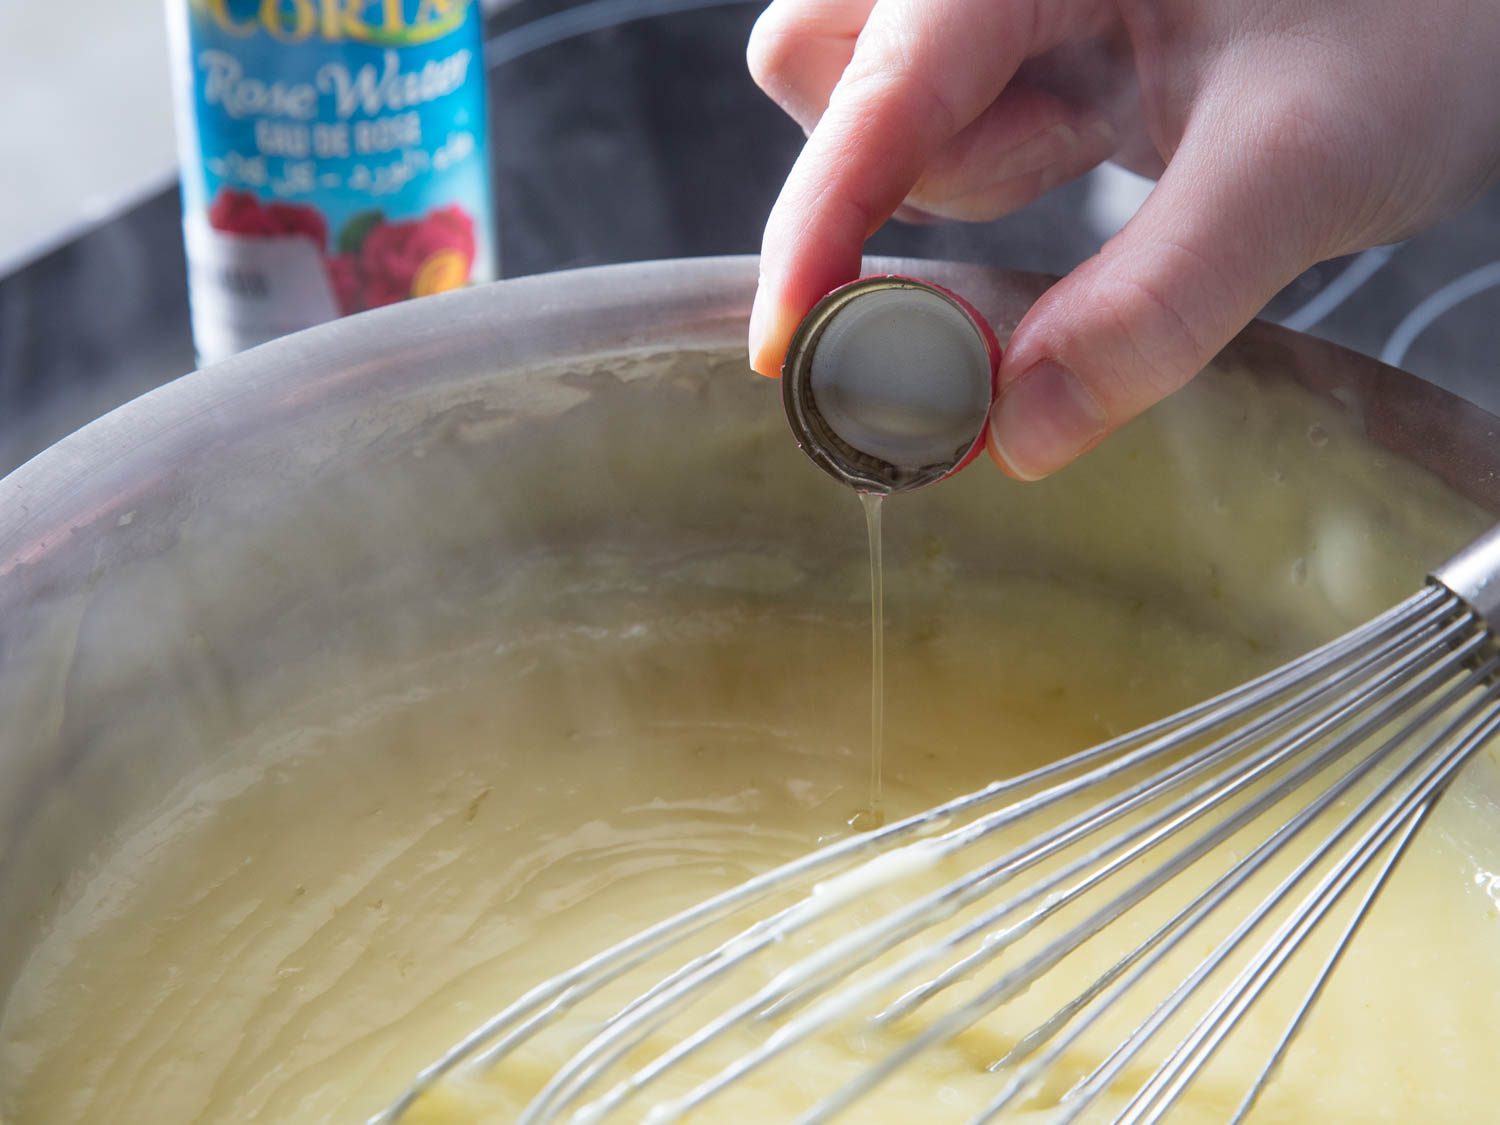
Rosewater is easy to find in the international aisle of major supermarkets, in well-stocked liquor or party stores, in Indian markets, or online, so, while it’s technically an optional ingredient, it doesn’t take much effort to step up your game. (It also turns up in my roasted winter strawberries and applesauce.)
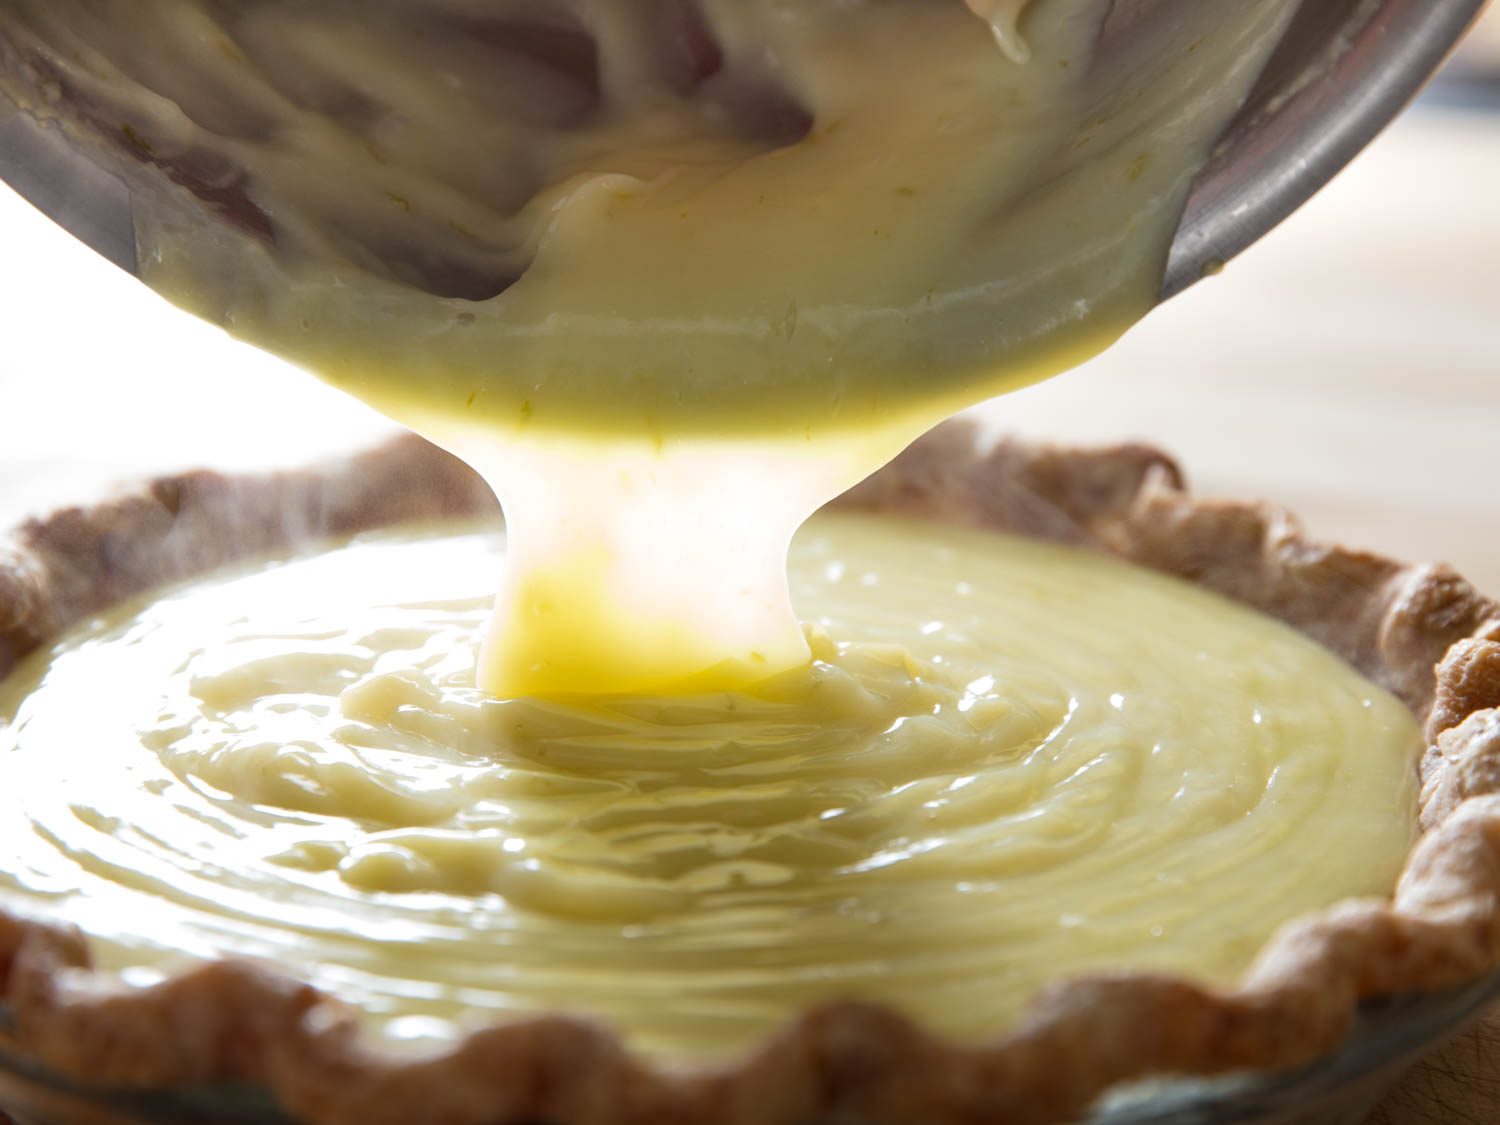
Pour the warm custard into a fully baked pie crust (check out my blind-baking tutorial for more info). I like to play up the Key lime pie vibe with the graham-y flavor of my whole wheat pastry crust, as its leaner formula nicely offsets the richness of the lime custard, but it’s still flaky and crispy, just like my old-fashioned all-butter pastry.
Finally, I top the pie with Swiss meringue. Because this style of meringue is fully cooked, there’s no rush to get it on the pie while the custard is still warm (a dubious practice at best; no custard is hot enough to fully cook a meringue on contact). That means you can prepare the meringue and finish the pie at your leisure, without having to race the clock.
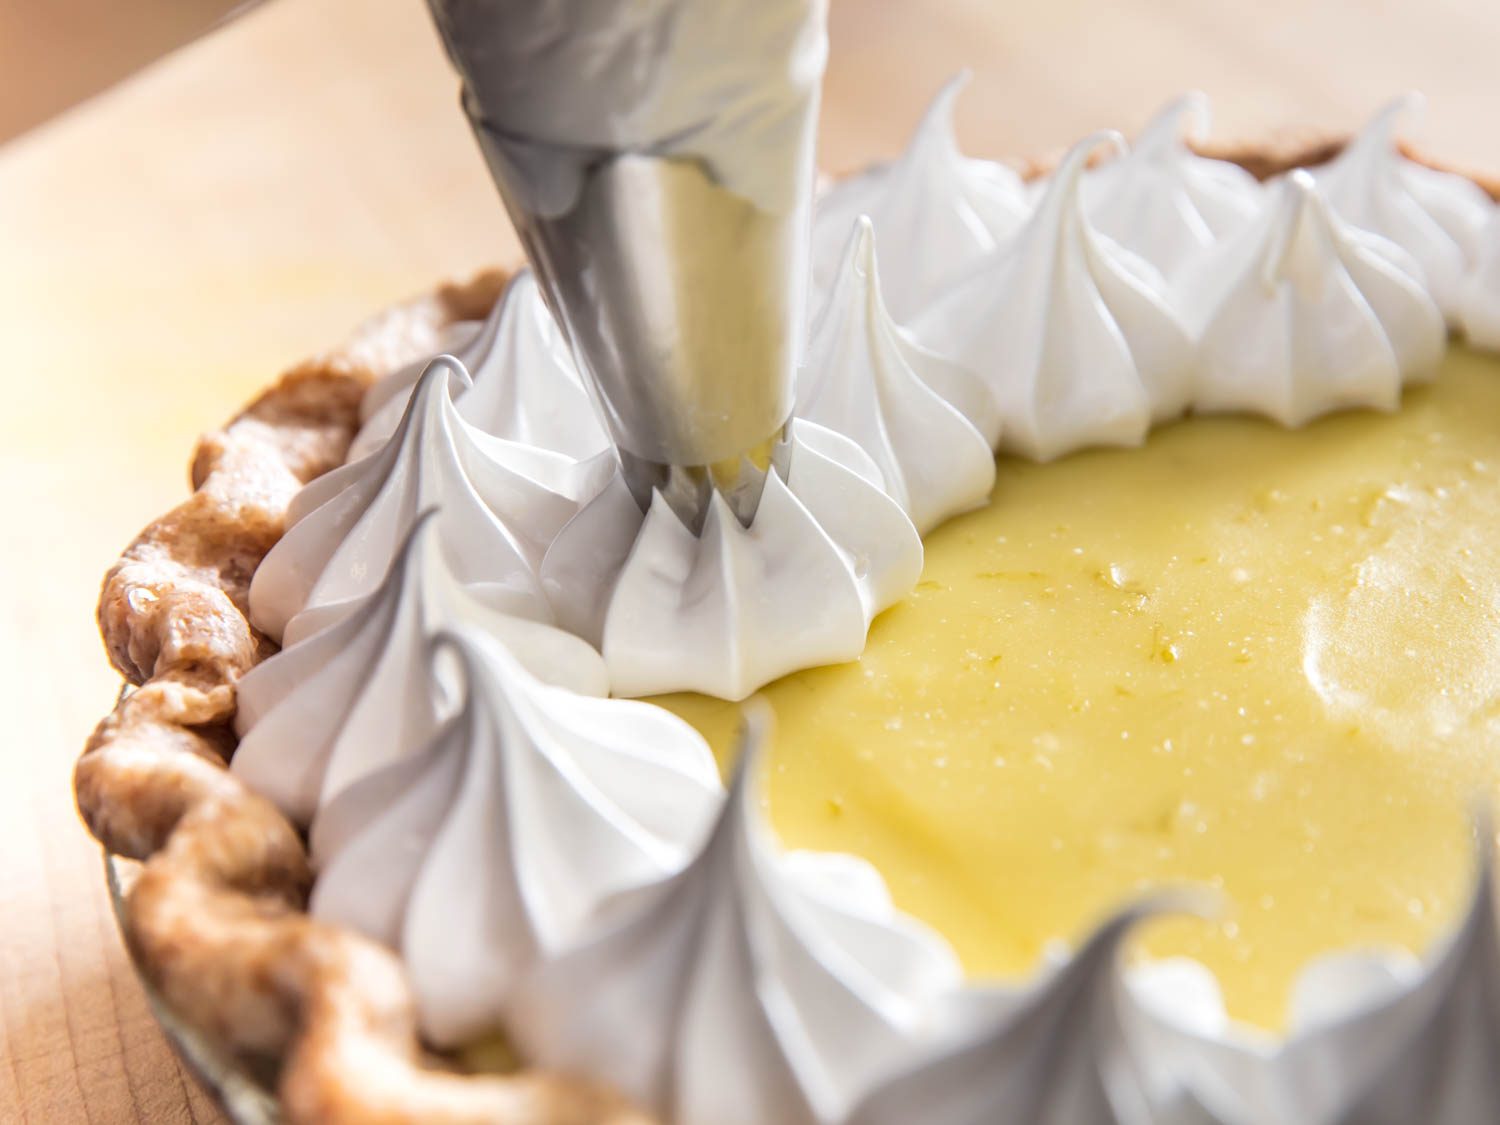
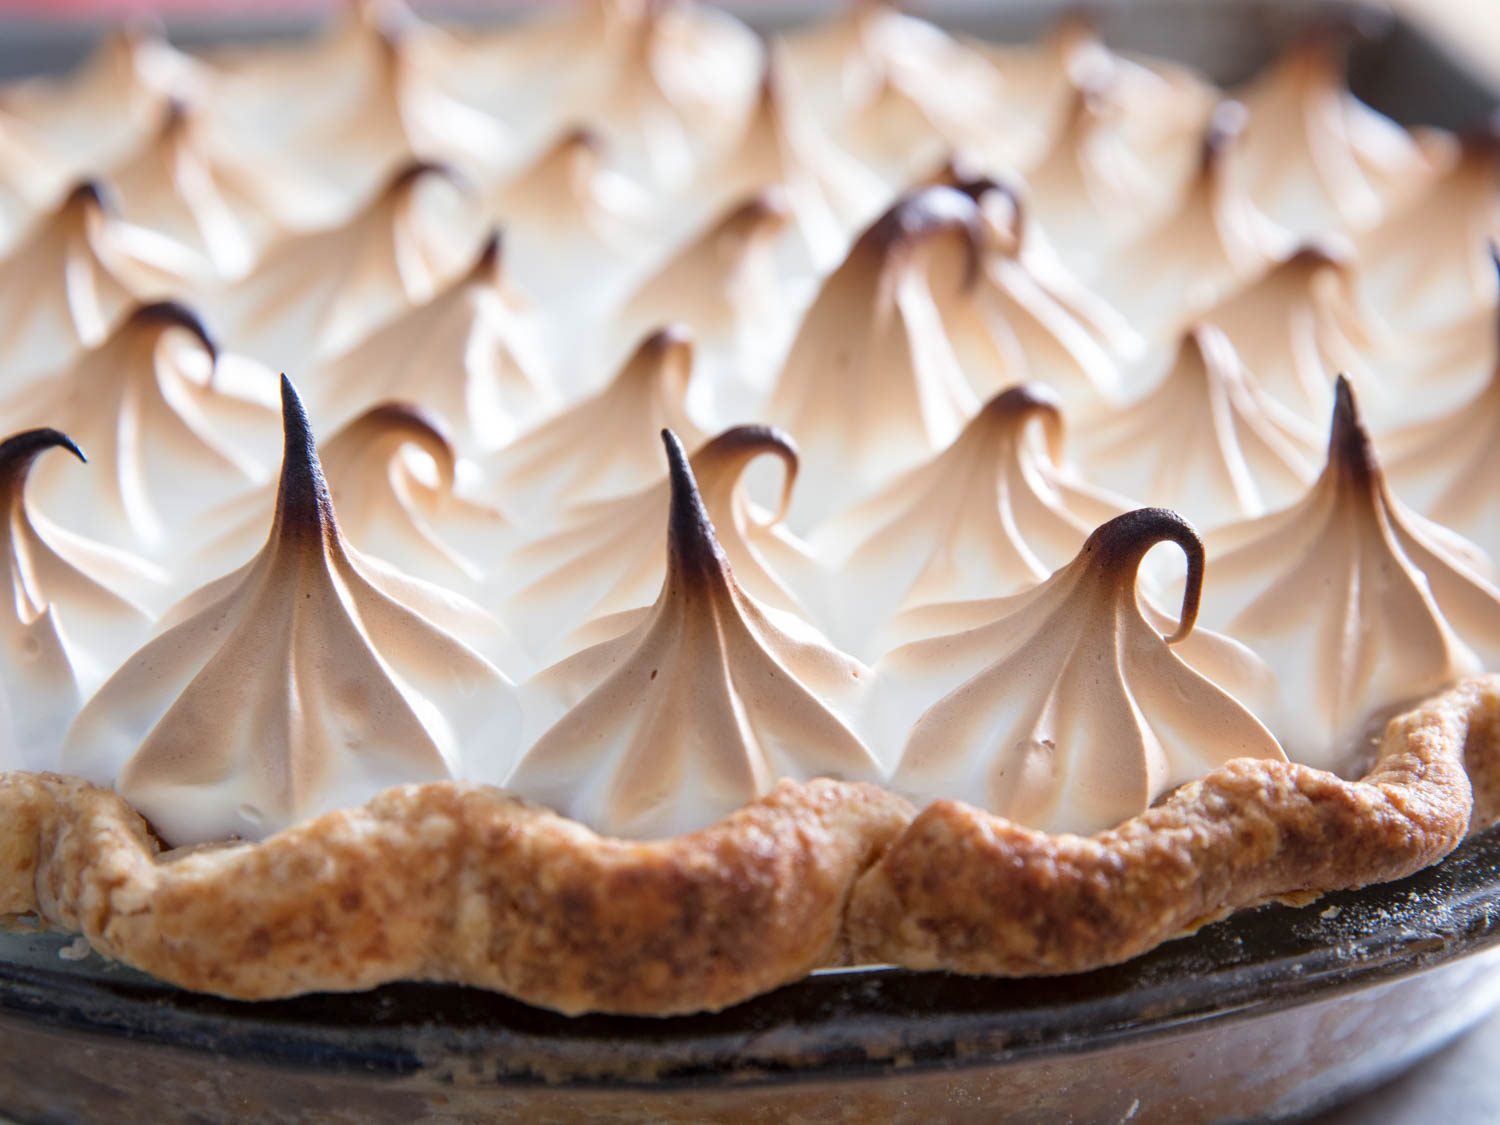
As a totally optional finishing touch, I use a disposable pastry bag fitted with a large star tip to top the custard with little kisses of meringue.
To ensure the meringue is stiff enough to pipe, it’s vital to stick to the recipe’s original ingredient ratio and cooking temperature, as low-sugar meringues or those that haven’t been sufficiently cooked won’t hold such stiff peaks. If you’re using toasted sugar left over from blind-baking the pie crust, please, please, please make sure the foil liner covered 100% of the crust. If any part of the crust is exposed, even if it isn’t in direct contact with the sugar, butter can bubble up from the crust and into the sugar. It’s not a lot of fat, but it’s enough to prevent the meringue from holding its shape when piped. Should that happen to you, forget about piping, and stick with old-fashioned swoops and swirls of meringue.
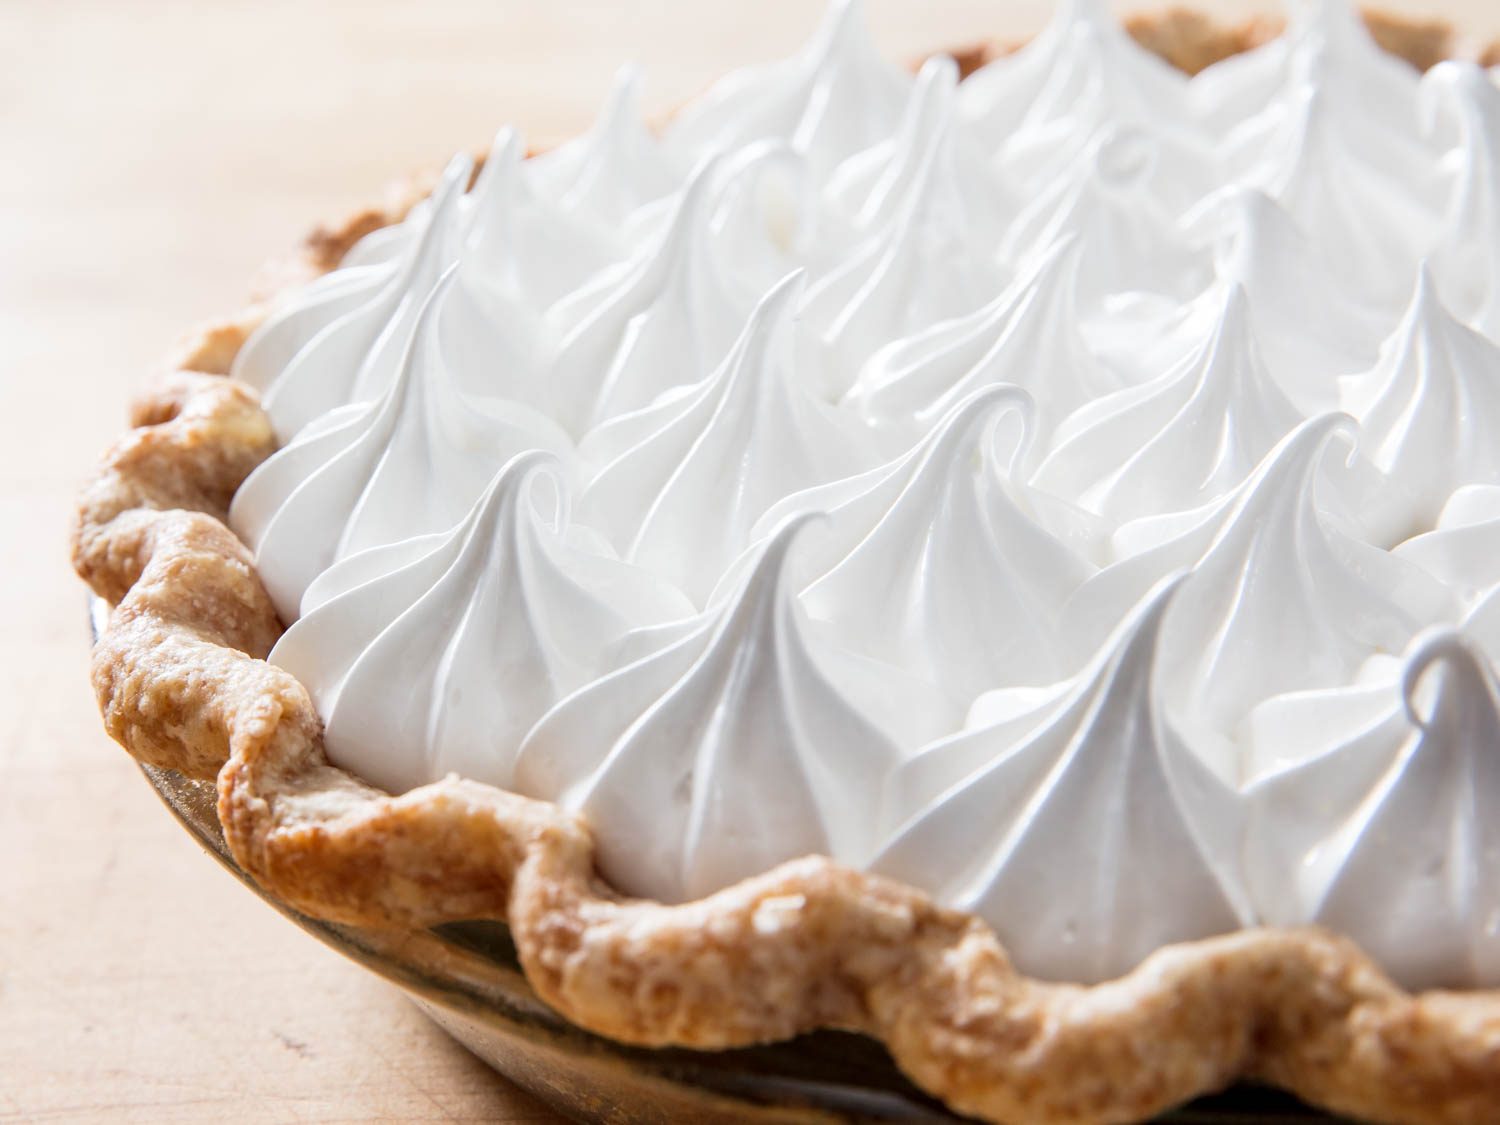
Whatever the style, I recommend baking the pie at 375°F (190°C) to puff and toast the meringue. The slow, gentle heat causes the meringue to expand as it bakes, giving it a lighter consistency than a meringue that’s simply toasted on the surface with a torch. Don’t believe me? Check out the video that accompanies my chocolate cream pie article, and watch the meringue swell as it bakes.
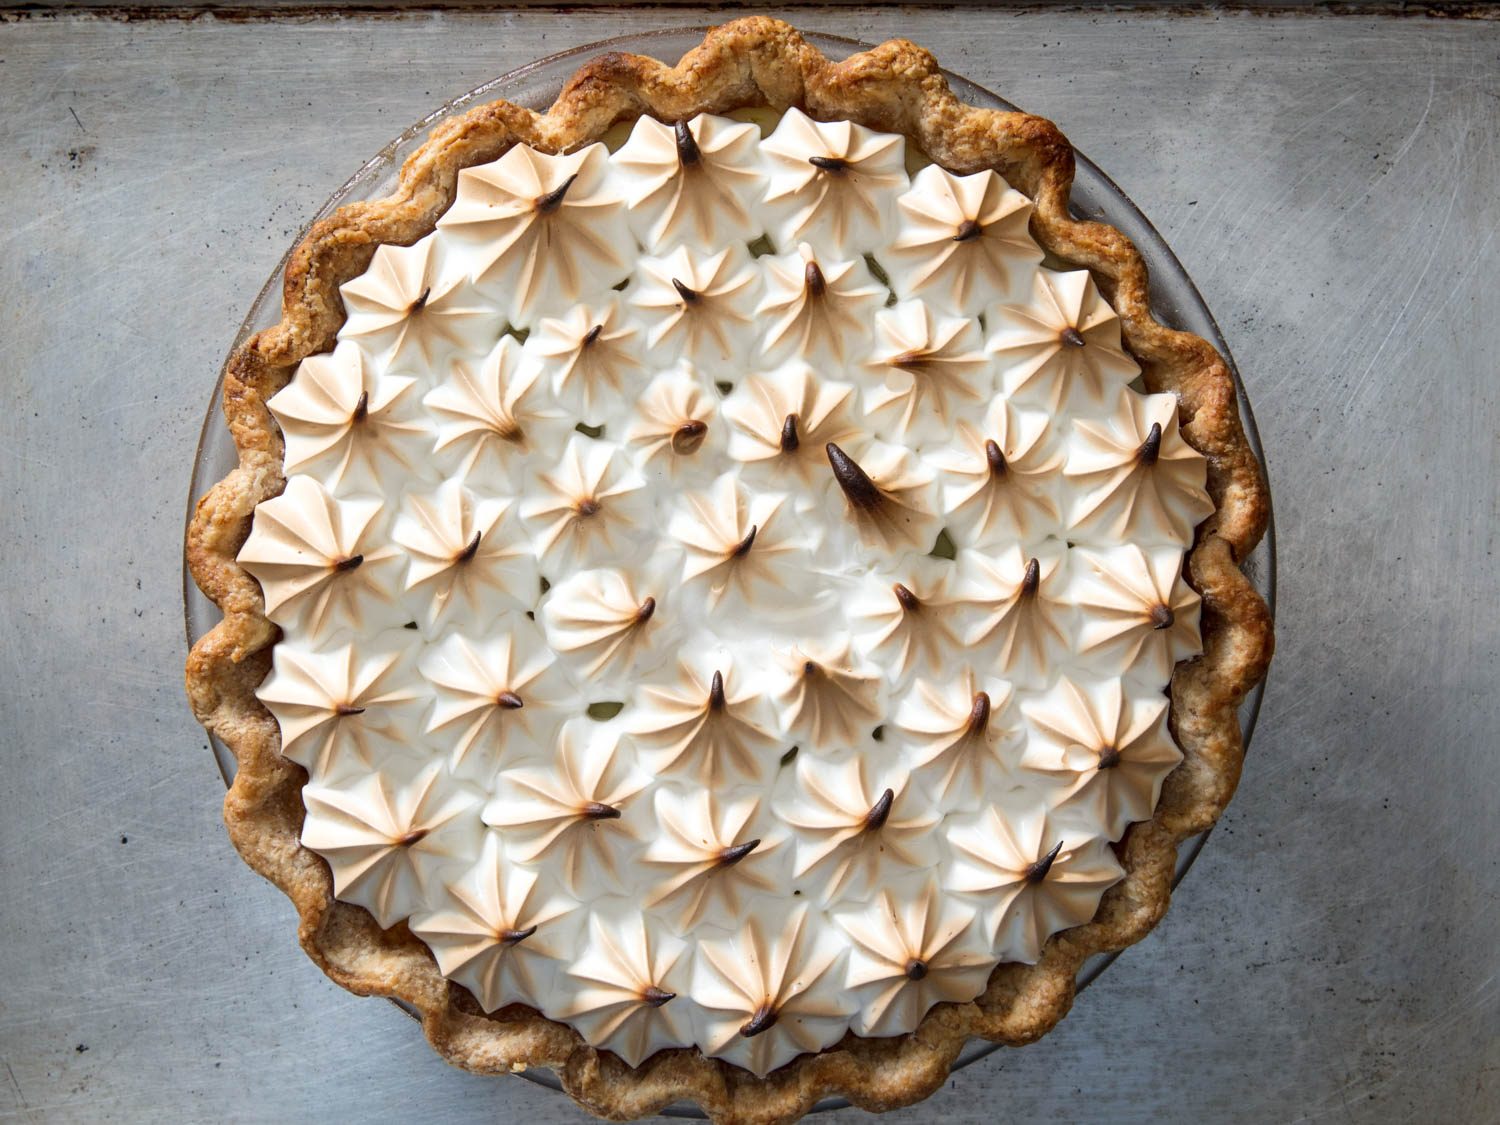
An enjoyable side benefit of piping the meringue is creating more surface area for browning, which balances its sweetness with a bit of toasty caramel complexity.
Cool the finished pie to room temperature, then cover with plastic and refrigerate until it’s no warmer than 60°F (16°C). It’s fine for the pie to be colder—I think it’s best served at 40°F (4°C)—but above 60°F, it’s simply too warm to slice.
Thanks to the whole wheat crust and the super-stable Swiss meringue, the pie keeps well for up to a week in the fridge, so you can enjoy it one slice at a time—the better to make that sunny flavor last over these gloomy winter days.
[ad_2]
Source link