[ad_1]
[Photographs and GIF: Vicky Wasik]
I’m always in search of new and exciting ways to incorporate more cheese into my diet. In our wedding vows, my husband promised to have and to hold and to always keep the fridge stocked with three varieties of cheddar. When the opportunity to develop a recipe for this South American cheesy bread arose, I skipped all the way to the dairy section, gleefully throwing blocks of Grana Padano into my basket.
In Bolivia, these rolls are called cuñapes; in Ecuador, they are known as pan de yuca; in Brazil, it’s pão de queijo; and in Paraguay and Argentina, they go by chipa. You also can’t forget the Colombian version, pan de bono, which incorporates masarepa into the dough. Aside from minor variations in technique and cheese type, they all rely on both cheese and tapioca starch for a bold flavor and incredibly chewy texture that’s instantly addictive. To avoid showing favoritism to one nation over another, I’m just going to call it cheesy bread. I scarf them down by the dozen, plucked right off the hot sheet tray, but they are traditionally served with coffee as an afternoon snack.
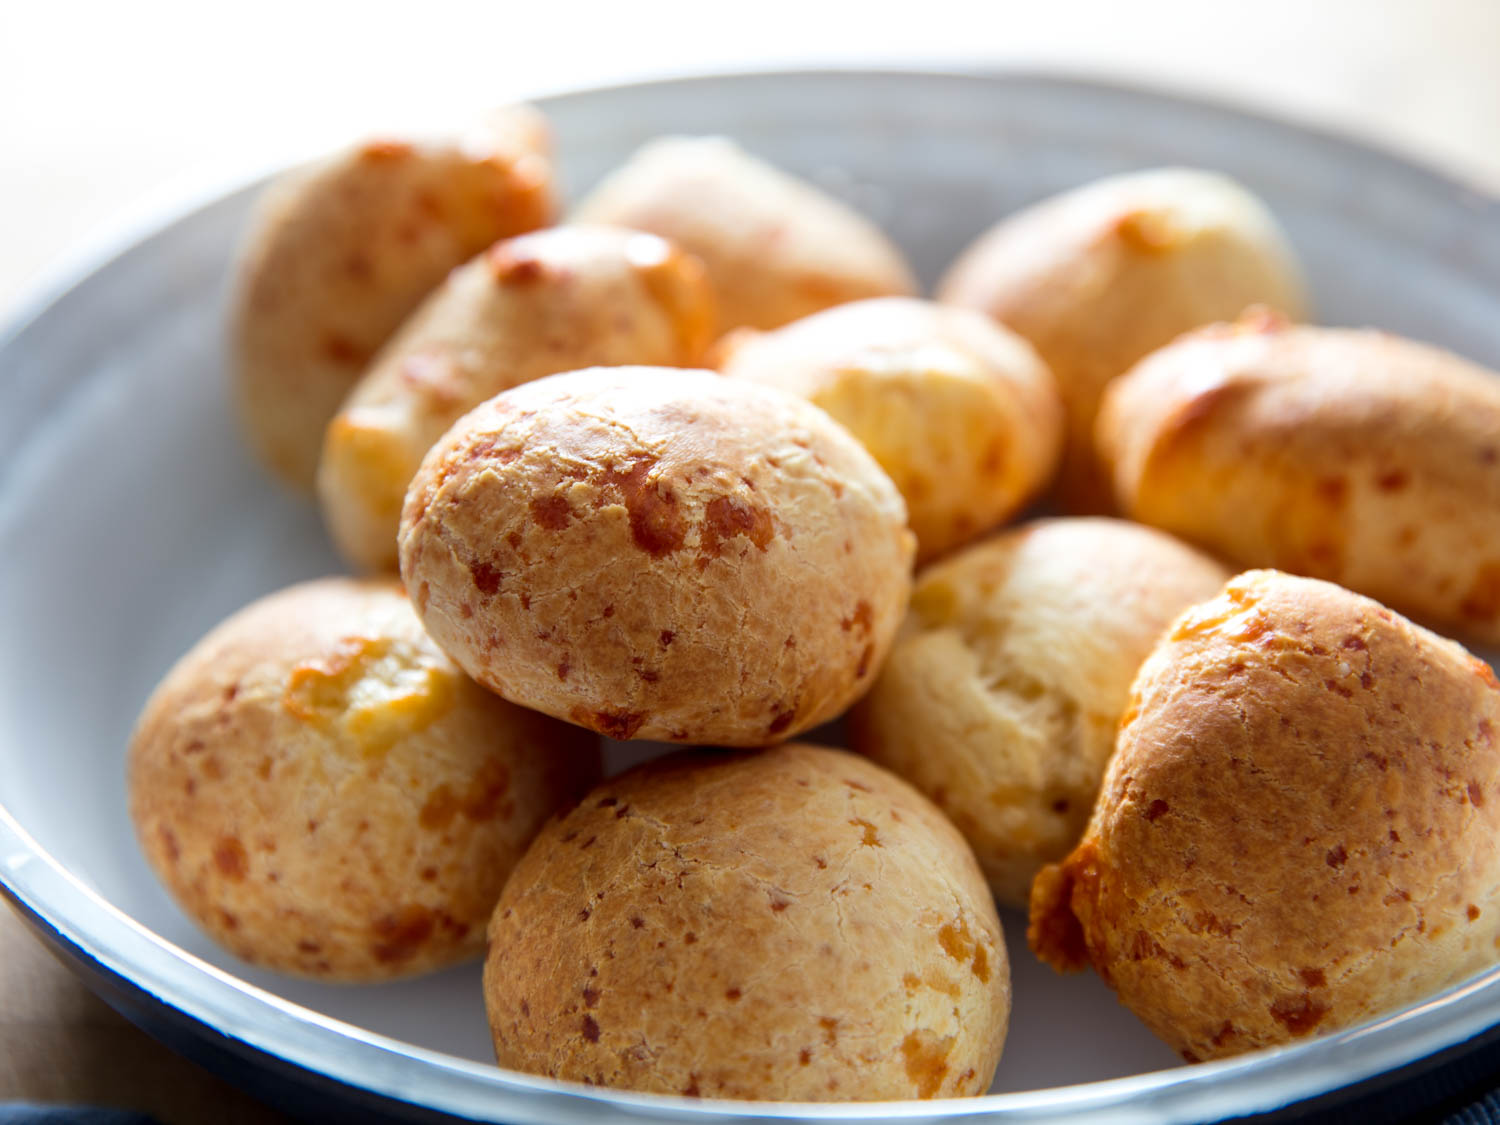
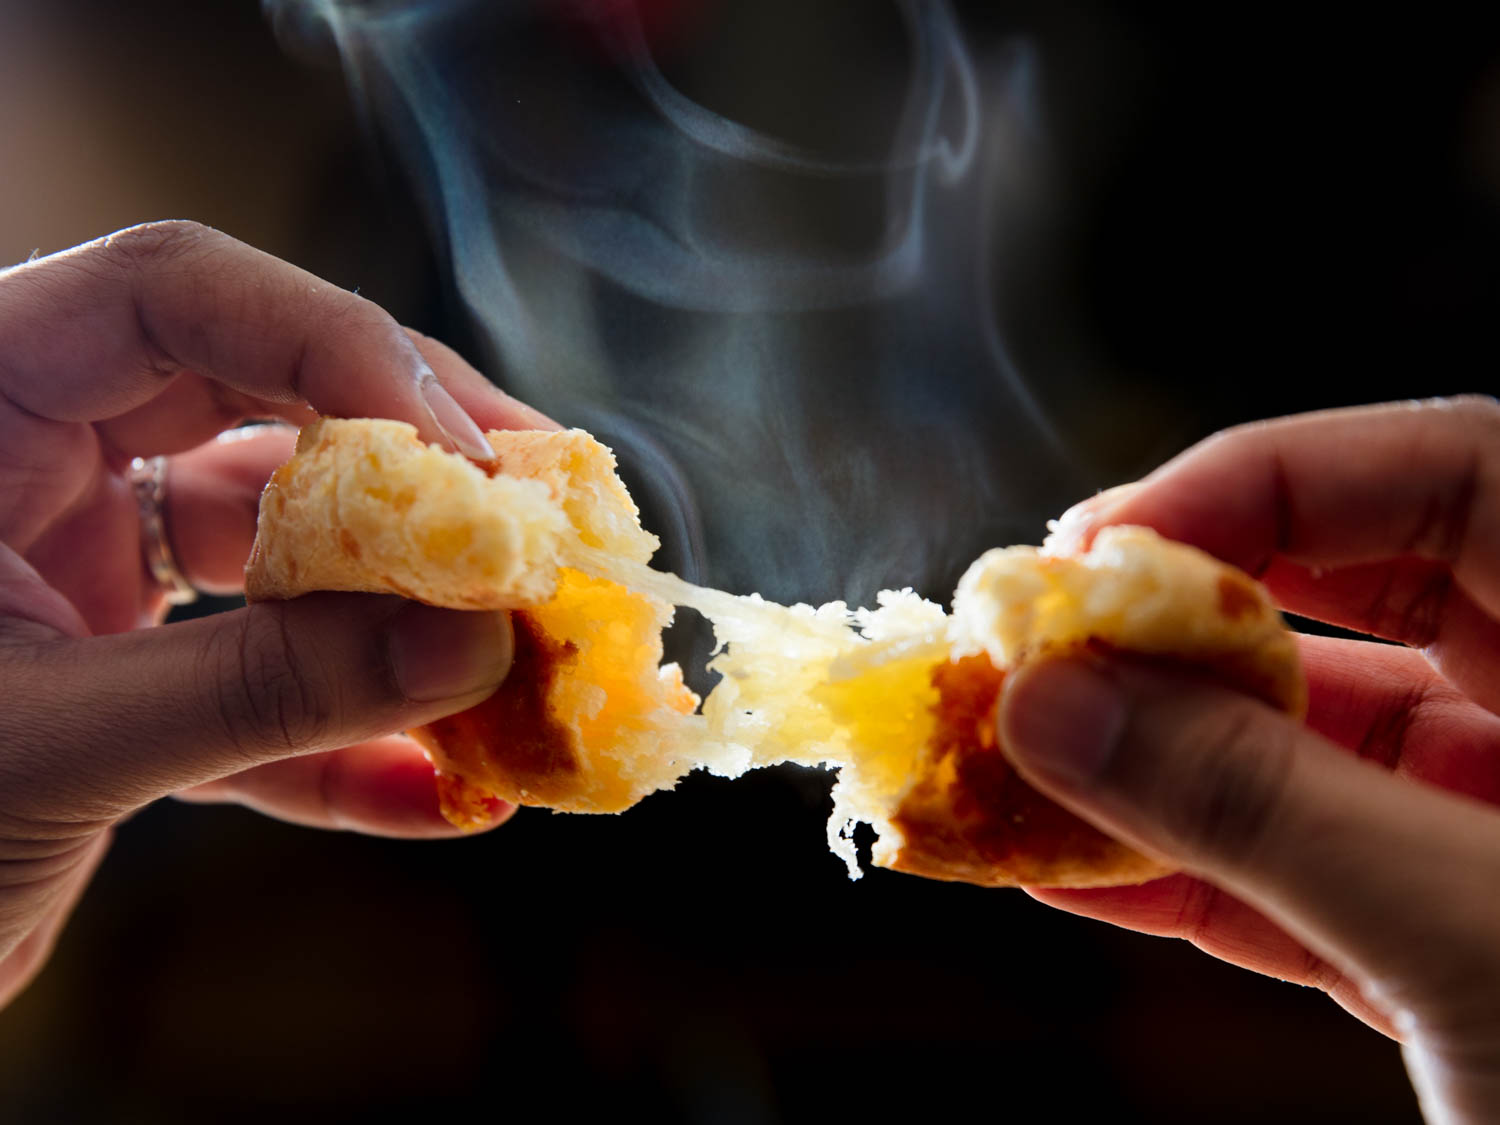
When made perfectly, the cheesy bread should have a crisp crust with a chewy and light interior. At its worst, the bread can be soggy, dense, and heavy. They are the simplest bread you can make—they require no kneading or proofing, just a quick mix with you hands to bring all the ingredients together—but the details make all the difference. I wanted to test all the variables to come up with a recipe that’ll bake up just right every time, no matter what you call them.
Tapioca Starch
The key ingredient in cheesy bread is tapioca starch. It’s a finely milled starch, derived from the cassava root, with a squeaky texture similar to corn or potato starch. Cassava root, also known as manioc or yuca, originated in northern Brazil, before it spread across all of South America. This explains the prevalence of this many-named cheesy bread throughout the region.
Once tapioca starch is hydrated and cooked, it has both the chew of mochi and the stretch of Hawaiian poi. These unique qualities of tapioca starch endow it with the texture of melted cheese even before any cheese is added. The combination of this texture along with the flavor of the salty and savory cheese is what makes biting into this bread feel like you’re eating warm cheese by the doughy fistful. Who could resist?
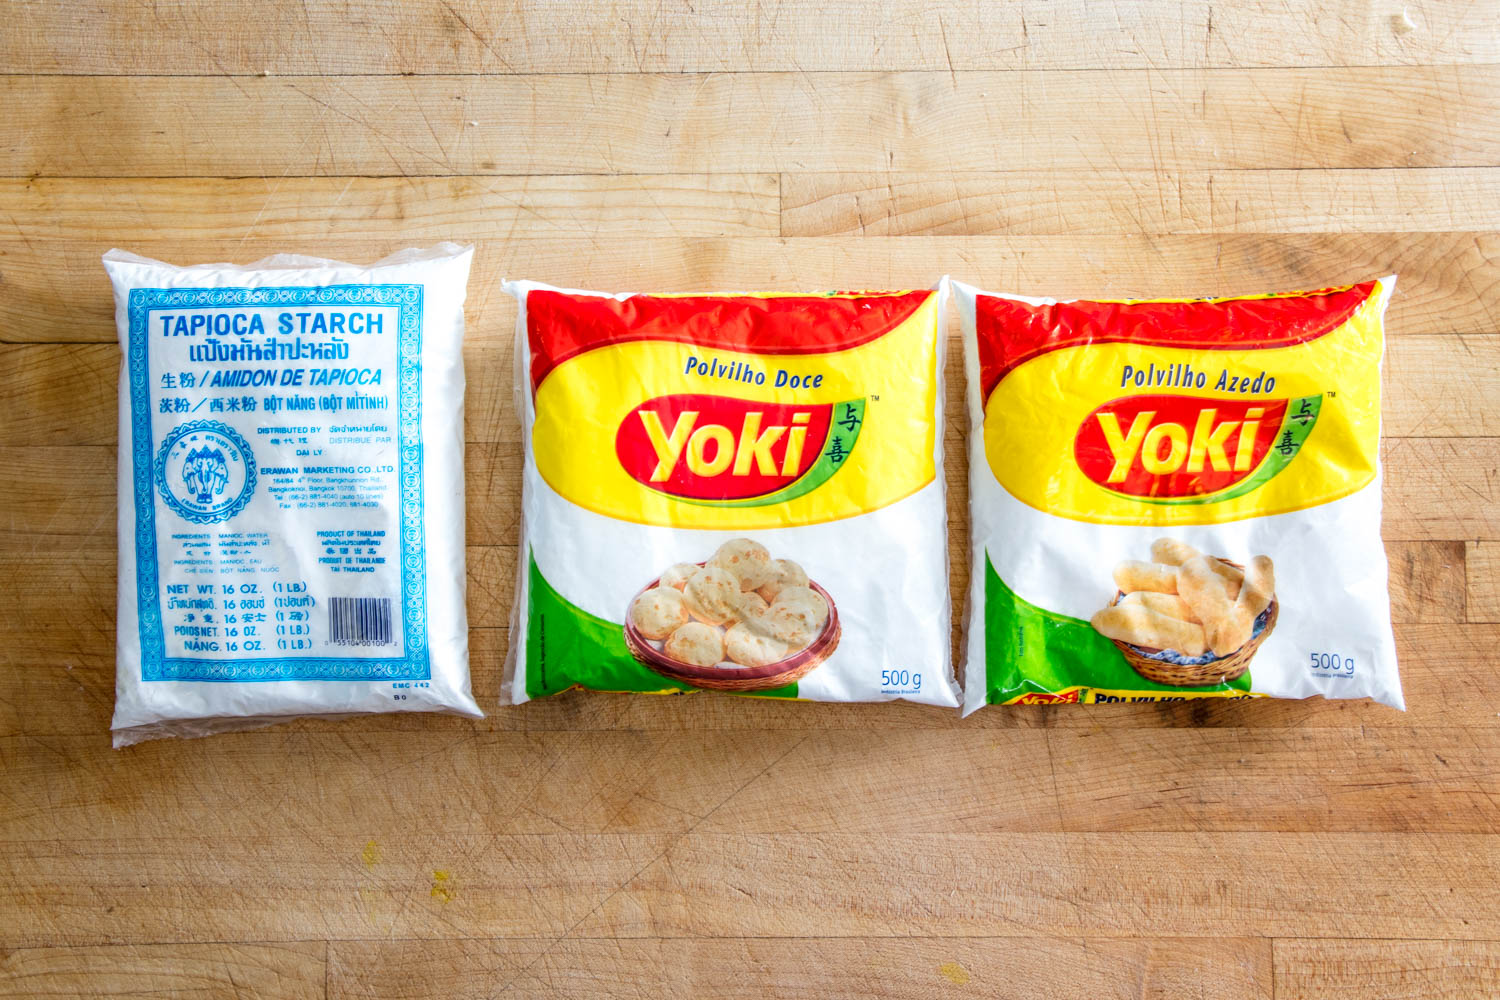
There are several brands of tapioca starch available and, although it is originally a South American ingredient, most of the brands available in the States are imported from Thailand. I wanted to see if there’s a noticeable difference between brands of different origins. I tested batches made with a Thai brand of tapioca starch versus Brazilian polvilho azedo and polvilho doce. The azedo starch is fermented before processing, resulting in a pleasantly sour taste; it is called for in most cheesy bread recipes throughout South America. The doce starch is unfermented and is also used in some cheesy bread recipes, but most often it finds its way into desserts.
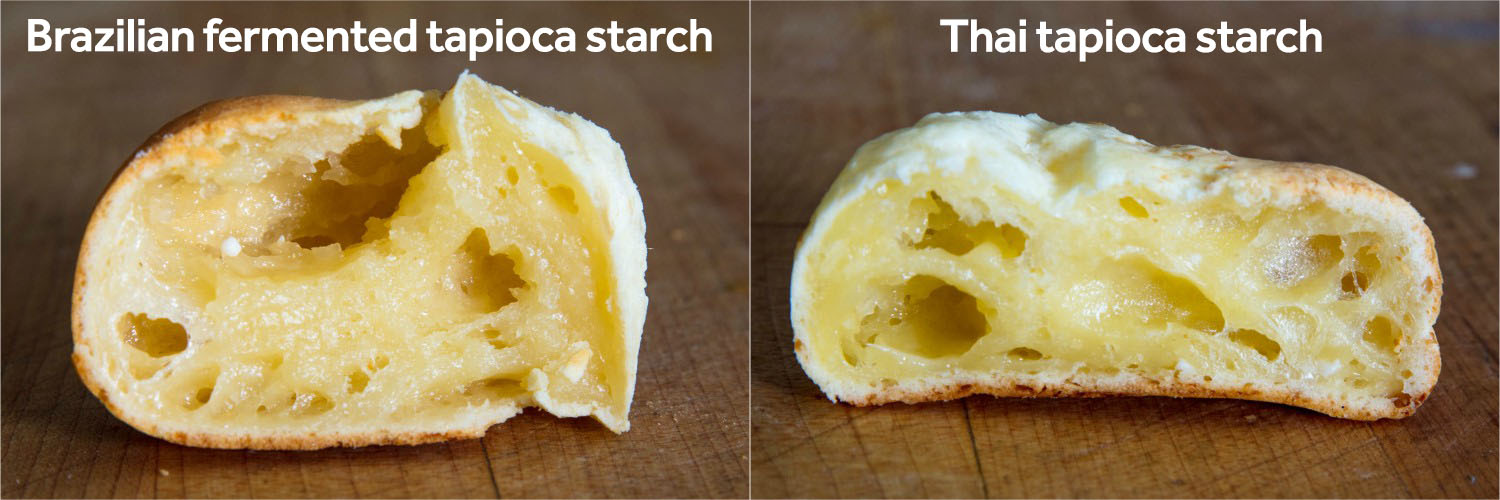
I was surprised to find that there are significant differences in both taste and texture between the three tapioca starches. The bread made with polvilho azedo was lighter in texture and had a heartier crunch than the bread made with the Thai starch. The Thai starch has a very fine texture, unlike the Brazilian starches, which have a more uneven grind. The imperfectly milled starch became a flawless final baked bread, while the fine Thai starch made bread that was dense and heavy. The sourness of the polvilho azedo also emphasized the sharp tang of the cheeses in a way that the polvilho doce didn’t. It’s definitely worth the effort of ordering polvilho azedo if you want to make the most flavorful cheesy bread.
The Queso Question
The type of cheese used in pão de queijo, cuñapes, or pan de bono depends on whether you’re making them in Brazil, Bolivia, or Colombia, etc. Most recipes call for queso fresco, but it’s not exactly like the Mexican queso fresco most commonly found around where I live. The particularities of each queso can vary greatly from region to region. The queso most commonly used has the crumbly texture of Mexican queso fresco, combined with the stretch of mozzarella, and the salty bite of Parmesan. I have yet to find this magical unicorn cheese in my corner of Manhattan, but a blend of Cheddar and Grana Padano does the trick.
Once you’ve gotten a handle on how the dough should look and feel, the cheese possibilities are endless. You may need to adjust the amount of liquid or butter in the dough depending on the water and fat content of each cheese, but after some simple tweaks the bread will bake up just fine with anything from a pungent blue to a briny feta.
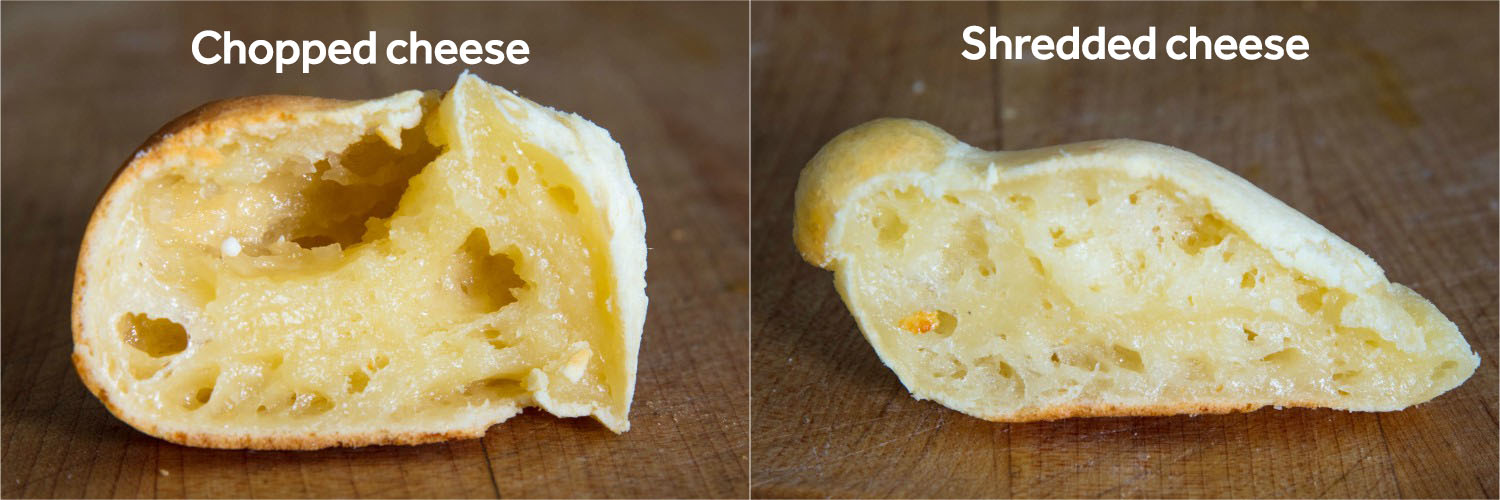
Regardless of what cheese you choose, one of the biggest factors is whether you use chopped or shredded cheese. The bread made with chopped cheese was lighter and had melty pockets throughout, while the bread made with shredded cheese was dense and heavy. This makes perfect sense if you look at the differences in volume between chopped and shredded cheese of equal weight.
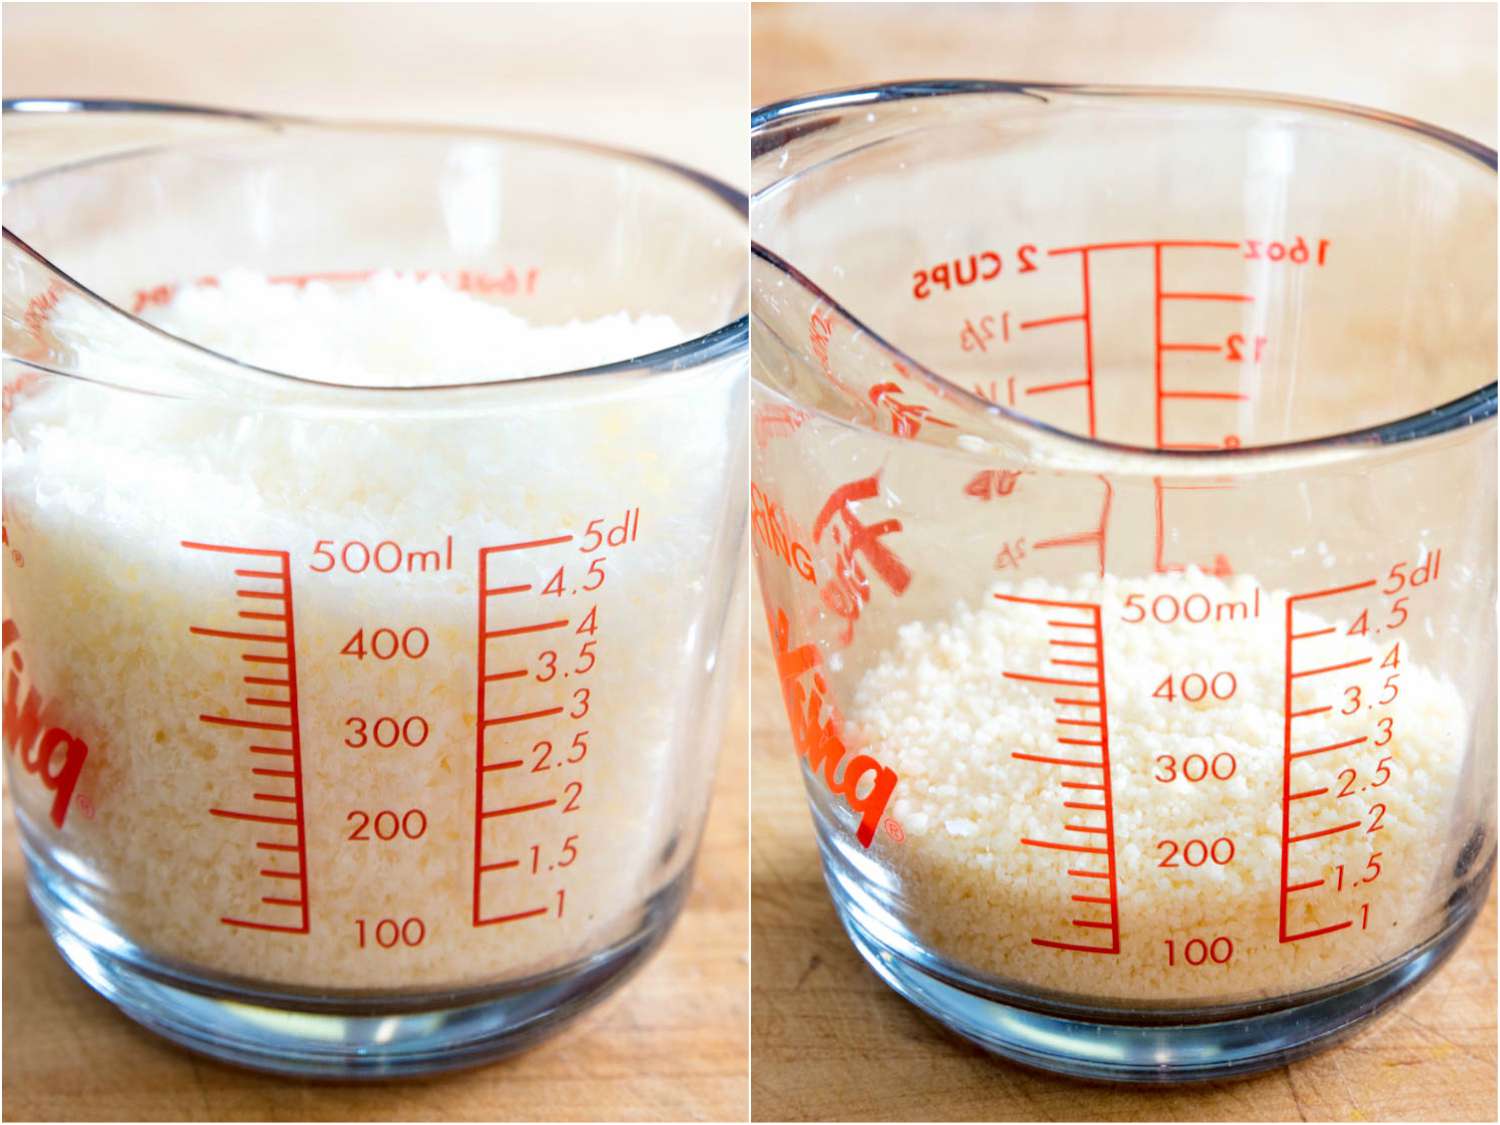
Shredding cheese significantly increases its surface area and volume, which allows it to be more evenly incorporated into the dough. Once baked, the shredded cheese melts faster than chopped, weighing down the dough and yielding an overly gummy and dense bread. On the other hand, the chopped cheese melts at a slower rate and creates little pockets of steam within the bread that puff up and lighten the rolls.
Making the Dough
Once you’re armed with the right tapioca starch and have retired your grater for the evening, it’s smooth sailing to cheesy bread land. There’s no need for a mixer, or even a spoon for that matter.
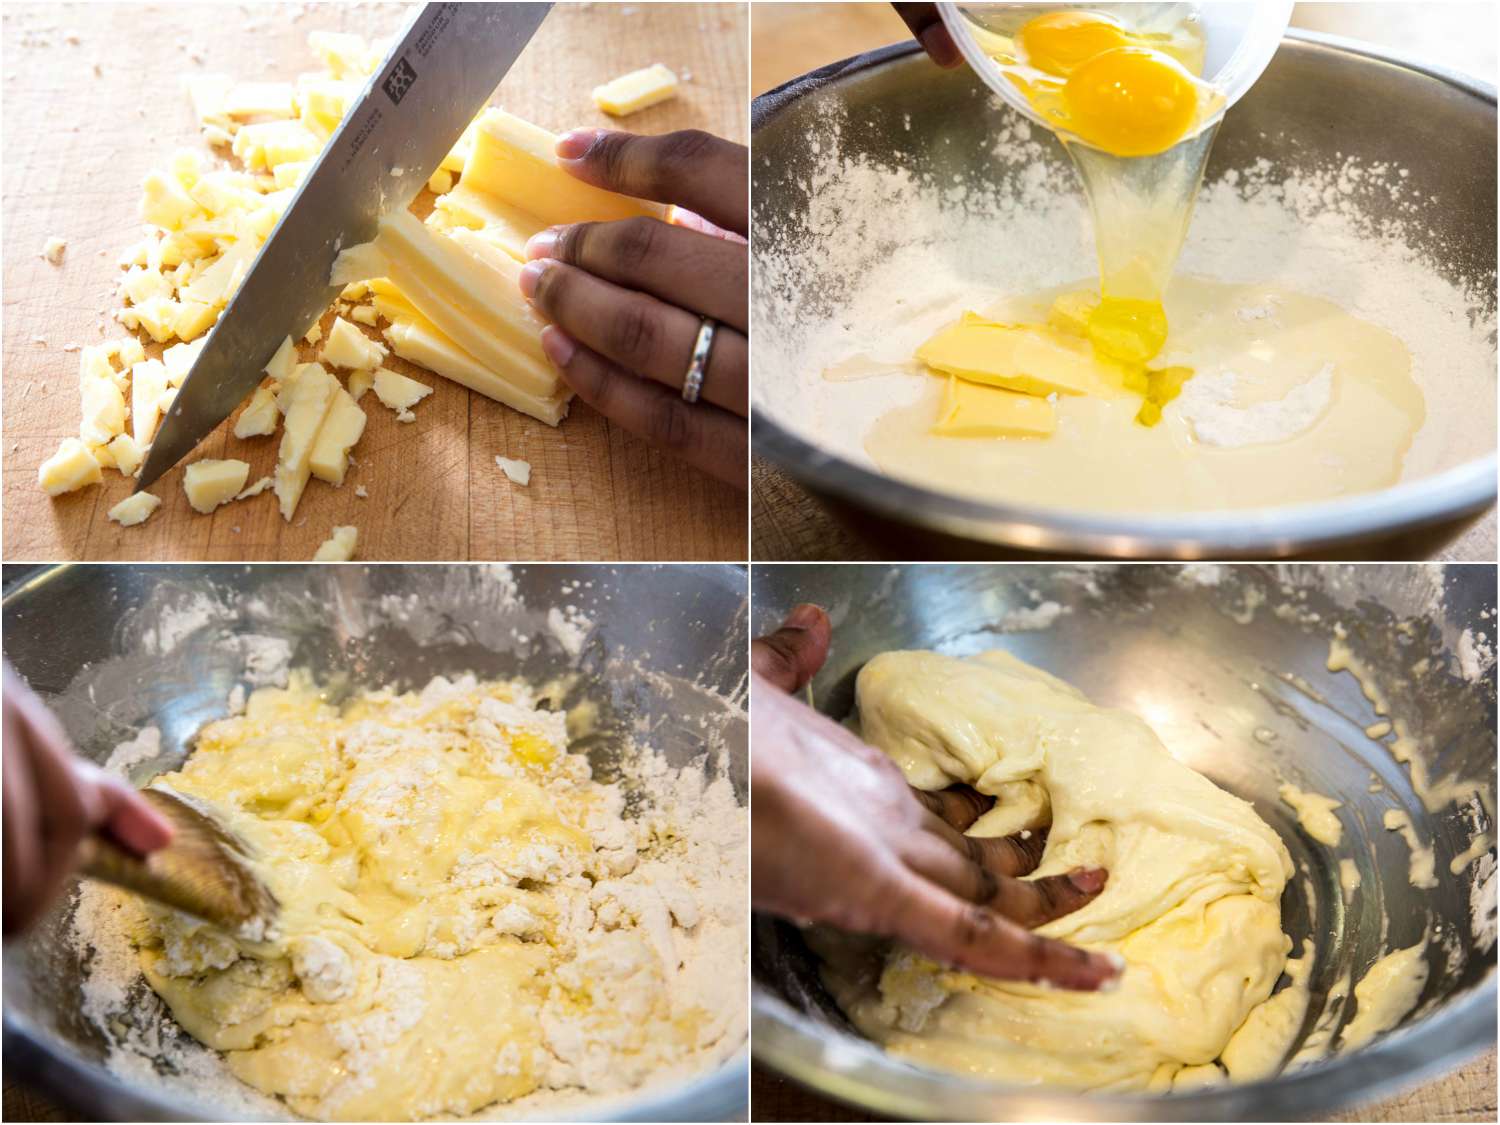
I mix together the tapioca starch with salt, baking powder, milk, butter, and eggs. After everything is evenly incorporated, I knead in the cheese, taking care not to overmix it. You want some uneven, large chunks of cheese to remain so they can melt into surprise pockets of delight.
Some recipes call for scalding the milk and others use cold milk instead. Dough made with scalded milk more evenly incorporates the cheese and bakes up into a uniform, round roll. On the other hand, dough made with cold milk leaves little clumps of cheese, which will burst through the bread’s crust during baking to form a crisp and crackly edge. It’s just a matter of personal preference, as well as regional habits—feel free to choose to scald or not scald.
Although you can bake the dough right away, letting the dough rest overnight fully hydrates the starches for a fluffier texture. Gluten-free starches take much more time and a higher ratio of liquid to hydrate than wheat flour. During the overnight rest, it’s imperative to cover the dough with plastic wrap pressed right onto the surface, similar to covering a pudding if you’re on the no-skin team. The dough quickly dries out to the point of no return and all that cheese will be lost forever beneath a hard crust.
If it’s your first time making cheesy bread, I strongly recommends using a scale until you get accustomed to the texture of the dough. This dough feels very different from dough made with wheat flour. Immediately after mixing it appears both runny and thick, while after the overnight rest it’s brittle and dry. After you get an understanding of how the dough should feel, run wild: eyeball quantities, try different cheeses, add seasonings. As long as the texture of the dough is right, you’ll end up with great results every time.
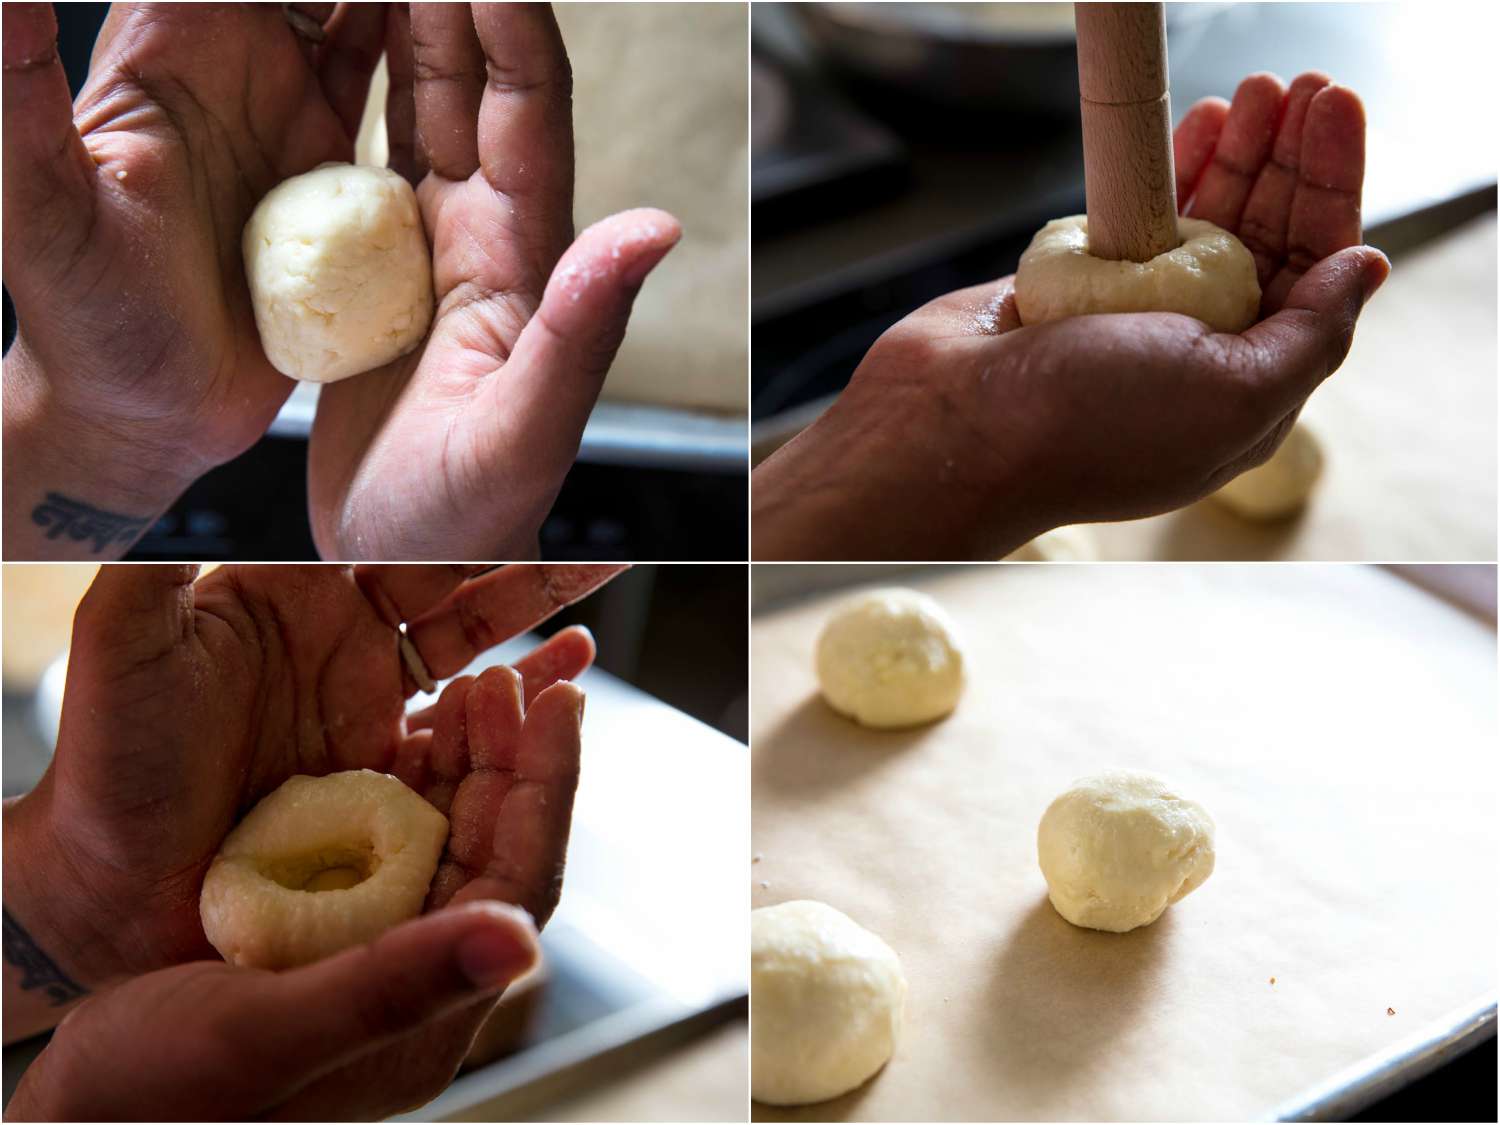
I like to form the dough into two-inch balls by rolling it between my palms. They can be formed into larger or smaller rolls, logs for dipping into coffee, or even donut shapes. Next, I make an indentation in the bottom of each with the back of a wooden spoon, which helps the dough bake evenly throughout.
You can bake them right away and eat them while steamy and warm or the dough balls can be frozen on a tray and bagged up for later. They bake up perfectly right from the freezer, just like cookie dough, so you can instantly get your cheese fix anytime.
Although perfect on their own, a dollop of jam in the center of each baked roll can transform it into a hand-held cheese plate. Sometimes I get crazy and make a grilled cheese out of a split bun. And instead of using English muffins, I might make an epic eggs Benedict on top of a pair of cheesy breads right out of the oven. I believe in doing whatever it takes to get more cheese in my life.
Your purchase on Amazon helps support Serious Eats.
[ad_2]
Source link